|
|
| Disclaimer: This is a 'relatively' easy mod to do. Most of the wires in the loom are for the lights in the front of the car and the horn. However if you have Traction Control there are wires for this in the harness also. If you attempt this we wish you the best of luck but CANNOT guarantee that you will not have any problems. Good luck! |
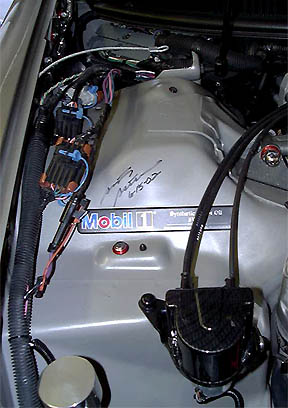
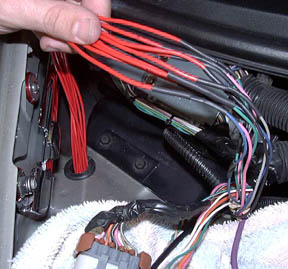
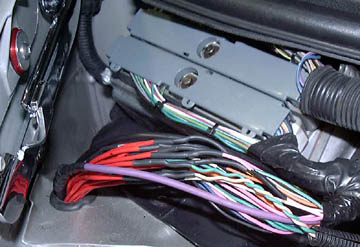
| This is a quick basic guide on how to do the “wires be gone” mod that will hide the huge ugly wire loom that runs along the top of the passengers side shock tower. Here is a picture of how it looks stock: |
 |
|
We decided that the best way to hide them would be to route them through the wheel well but there are two problems. First that the wires are too short and second that the plugs (where the two looms meet) are too big to fit through a reasonably sized hole.
We then decided the way to do it would be to cut the loom, lengthen the wires, run them through a hole we would create then route the wires into the wheel well. |
| Step one: Remove the inner fender well. This is pretty easy, jack up the car (using jack stands, safety glasses, Kevlar vests, and anything else you can think of for safety). Pull the wheel so you have room to work. The inner fender well is held in place by several screws.. The toughest ones are the two on the backside of the fender lip. These are some sort of funky GM type so in the interest of time I broke them off (later replace with a screw type connector like in the front fender clip screw). |
| Remove the fender well.. (note: If becomes too difficult to figure out how to pull the inner fender well then this isn’t a mod you should attempt without help |
| Step two: Drill a hole. Drill a hole just forward of the ECM. This seemed like the best place to run the wires out of the engine area to the wheel well. See figure below: |
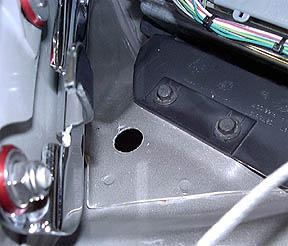 |
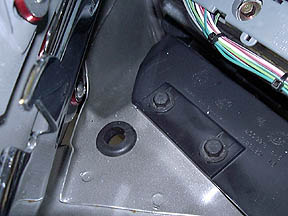
| Now insert a matching grommet in the hole. We found an inch hole with corresponding grommet gave us enough room to work. |
 |
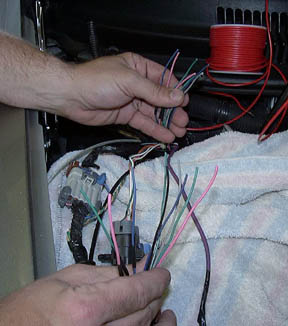
| Step 3: Start cutting wires |
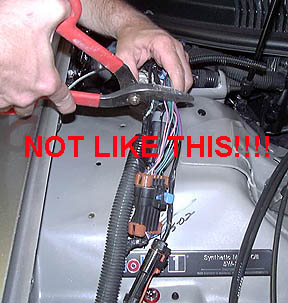 |
| The above is a joke.. This is where you need to take your time. Do ONE set at a time. Be sure to mark duplicate colors so that you do not confuse them! Unwrap all the old electrical tape from the first loom and inventory the wires.. Don’t mix them up! |
 |
| Cut the extension wires. We used 16 gauge (a little bigger than stock) just to be on the safe side. Add a 15” extension to each of the wires. Make sure you solder them right. We then heat shrinked each of the wires. Run this first set through the grommet hole. |
 |
| With the wire extended through the hole its time to attach the wires with the plug on it. Again, MAKE SURE YOU ATTACH THE RIGHT WIRES!! Pull the wires.. Triple check your work. Time spent here will save you many hassles in the future. Consider yourself warned. : ) |
 |
| Repeat the process for the other two looms and for the LARGE purple wire (extend the purple with a larger gauge wire, we used a crimp in this case due to the size of the wire).. |
| Step four: Careful – the large black wire IS NOT A WIRE.. It’s a tiny vacuum hose that has something to do with your AC unit.. You will need to find some small vacuum hose (PepBoys or such) to extend this much like a wire. I slipped the hose over the factory one and secured it with zip ties. |
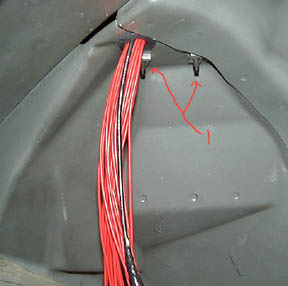
| When you have all of them done you will see a lot of wire coming through the hole like this: (for reference the 1 points to the bolts that hold down the computer cover.. |
 |
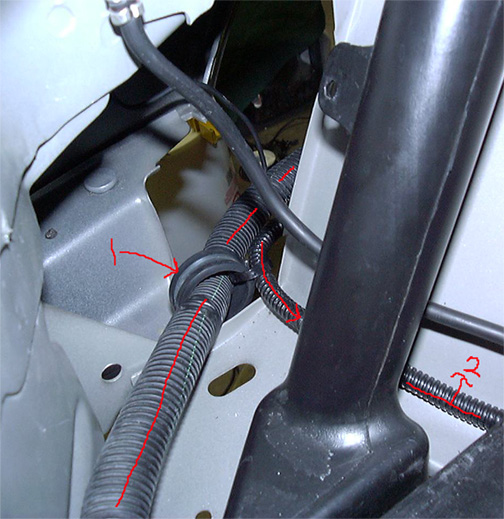
| This picture shows where the wires RE-enter the engine compartment.. You can see the fill neck for the radiator overflow tank. #1 is the Main wire loom entering from the wheel well. #2 is the wires for the ASR/TCS which were routed low near the battery hold down (note: its much easier to pull the battery for all this). You will also notice 1 points to a wire hold down that I simply secured to an existing screw using a 6mm nut. |
 |
| Here is a picture of all the wires (and vacuum hose) going through the grommet. |
 |
| The completed and extended wire loom. Note the zip ties used to neaten everything up. You can also see the vacuum line near the top (ran separately). I then wrapped the entire loom in electrical tape just as an extra safety measure. |
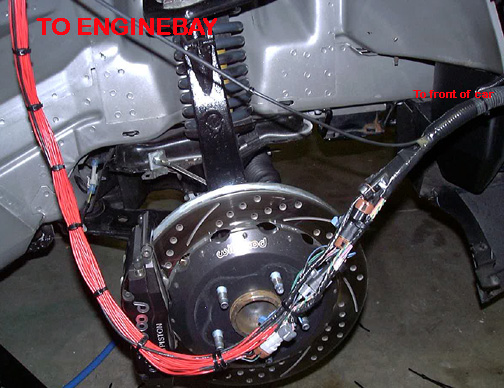 |
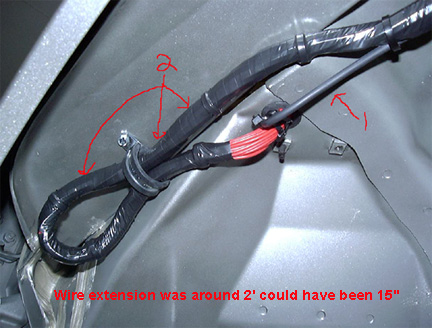
| Since we were the first to do this we erred on the side of caution and made the loom much longer than need (2 feet).. So I had to mount the excess wire in the top of the fender. #2 marks the taped up wire loom (note wire clamp used). #1 is the infamous vacuum hose. You should only have to extend the wires 15”’s tops so your mounting may vary. |
 |
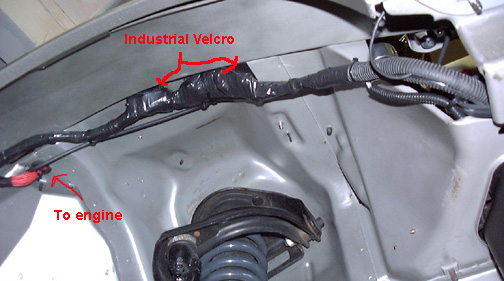
| Here is a picture of entire loom attached to the top inside of the fender. I used industrial Velcro to hold it all in place.. It’s a tight fit but the wheel well went back in fine and now it all looks very clean inside. |
 |
| And here is the final result: |
 |
| HUGE thanks to Rob (Poltergeist) for helping me with this project.. : ) |
| If you have any question email me at stevenrupp@sbcglobal.net… Good Luck! |